Thursday, December 8, 2016

PS Scripts–Add to Path Environment Variable

Here’s an easy and quick way to add a string to your Path environemnt variable:

[Environment]::SetEnvironmentVariable("Path", $env:Path + ";C:\SomethingYouLike", [EnvironmentVariableTarget]::Machine)

And…you’re done! ;)

Sunday, December 4, 2016

Windows Tips – Display Previous Logon Information

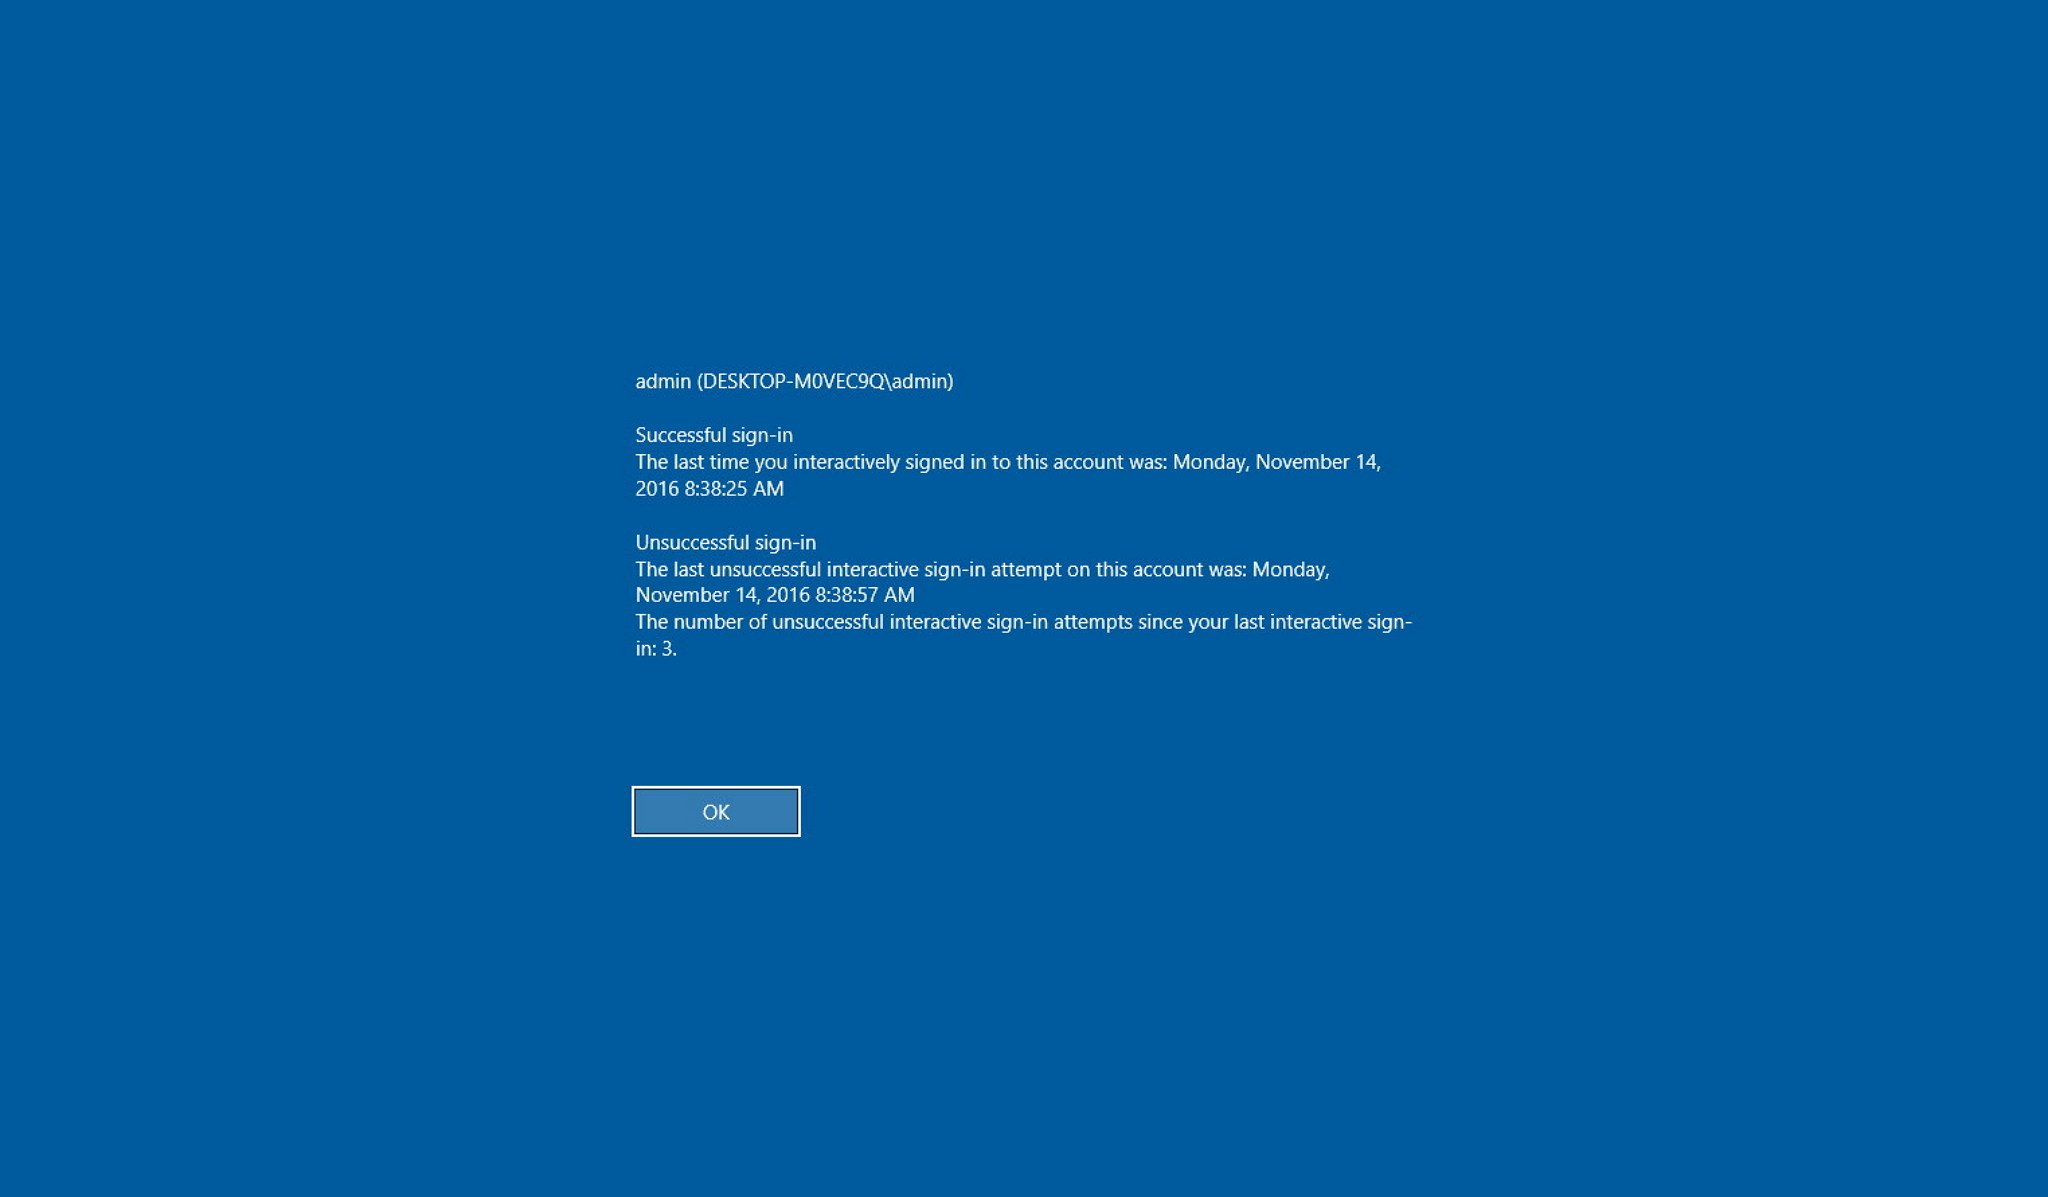
For debugging purposes you may need to get information about the last login on a machine, so here’s a tip to show you that information in a very easy way.

You can use both Group Policy or Registry to achieve this:

Group Policy

  • Open your GPO Editor (if local gpo just type gpedit.msc from “run…”)
  • Navigate to Computer Configuration > Administrative Templates > Windows Componentes > Windows Logon Options
  • On the right side double-click “Display information about previous logons during user logon
  • Now just select “Enabled” and than “Apply
  • Click OK to finish


Registry

  • Open registry editor (type regedit from “run…”)
  • Navigate to HKEY_LOCAL_MACHINE\SOFTWARE\Microsoft\Windows\CurrentVersion\Policies\System
  • On the right side create a new DWORD (32-bit) value
  • Name it “DisplayLastLogonInfo
  • Double-click the DWORD you’ve just created and change the value from 0 to 1
  • Close registry editor to finish

And you’re done!
For both cases, restart your machine to view the change in action.

Saturday, December 3, 2016

Windows Tips – Removing Network Icon from Lock Screen

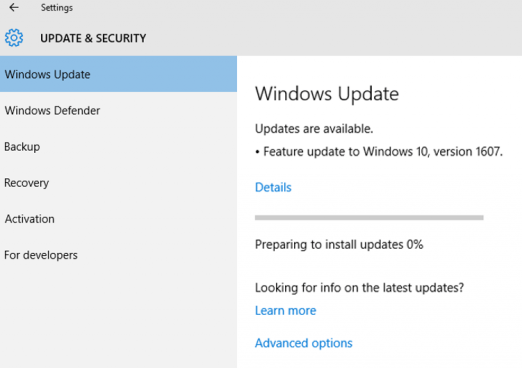
Usually you can achieve Windows customization by simply running throught Control Panel (or Settings) menu, or for a more enterprise approach, you can apply group policies that helps doing the job.

Well, for some reason there’s no direct option though GPO to remove the network icon from Windows lock screen., so here’s a tip to do it using registry editor.
You can use it directly on Windows or using Group Policy Preferences (GPP) on your enterprise environment.

Registry

  • Open registry editor (type regedit from “run…”)
  • Navigate to HKEY_LOCAL_MACHINE\SOFTWARE\Microsoft\Windows\CurrentVersion\Policies\System
  • On the right side create a new DWORD (32-bit) value
  • Name it “DontDisplayNetworkSelectionUI
  • Double-click the DWORD you’ve just created and change the value from 0 to 1
  • Close registry editor to finish

Now just restart you’re computer and you’re done!

VDISM – Easy WIM Servicing and Control

image

So…although you’re a geek and you really like to create your own scripts for managing your WIM files, sometimes you feel that a GUI app would be just great and it would really be a time saver.

Some of you may already know a tool called GImageX but from my experience I think this one its superior.

VDISM, available throungh SourceForge website, it’s a fenomenal tool with a very simple interface that gives you access through a graphical interface to all things you need for servicing WIM files.
It’s really really easy to use and so intuitive that you will probably will not use command-line anymore.

Features:

  • Driver Servicing
  • Package Servicing
  • Unattend Servicing
  • Windows Edition Servicing
  • Appx Servicing
  • Application Servicing
  • WIM Boot Entry Servicing
  • Append Image Servicing
  • Apply Image Servicing
  • Capture Image Servicing
  • Delete Image Servicing
  • Export Image Servicing
  • Image Info Servicing
  • List Image Servicing
  • Mount Image Servicing
  • Split Image Servicing
  • International Servicing
  • Provisioning Package Servicing
  • Default Associations

Go ahead and try this great tool: SourceForge – VDISM

Thursday, November 17, 2016

PS Scripts – Change Windows Service Logon Account

Need to change a Windows Service logon account with Powershell?
Here’s an easy and quick way to do it:

$strSvcStartScr = Get-WmiObject win32_service -Filter "Name='browser'"
$strSvcStartScr.Change($null,$null,$null,$null,$null,$false,’domain\username’,'password') | Out-Null

All you’ve to do is change the service name on the first line and the domain/username and password on the second.

And….your done!

Thursday, November 10, 2016

Microsoft Productions–Productivity Future Vision

From now and than, Microsoft launches some very interesting videos about they’re vision about the future.
It’s like a glimpse ahead of how Microsoft sees us (and by the way they’re business) in a not so far distance in what concerns to health, education, energy, work and…every other technology that surrounds us.

This futuristic videos may also show us a glimpse of future products and services that Microsoft may launch next.

The below video about Microsoft’s Vision for Productivity, it’s from 2009 and show us some interesting things, specially about how touch technology and the “mobile first” mantra was a 2009 Microsoft’s vision and how for example Surface devices are the implemation, in real world, of that vision.

Wednesday, November 9, 2016

VMware PowerCLI Scripts – Get ParentVM used on Pools

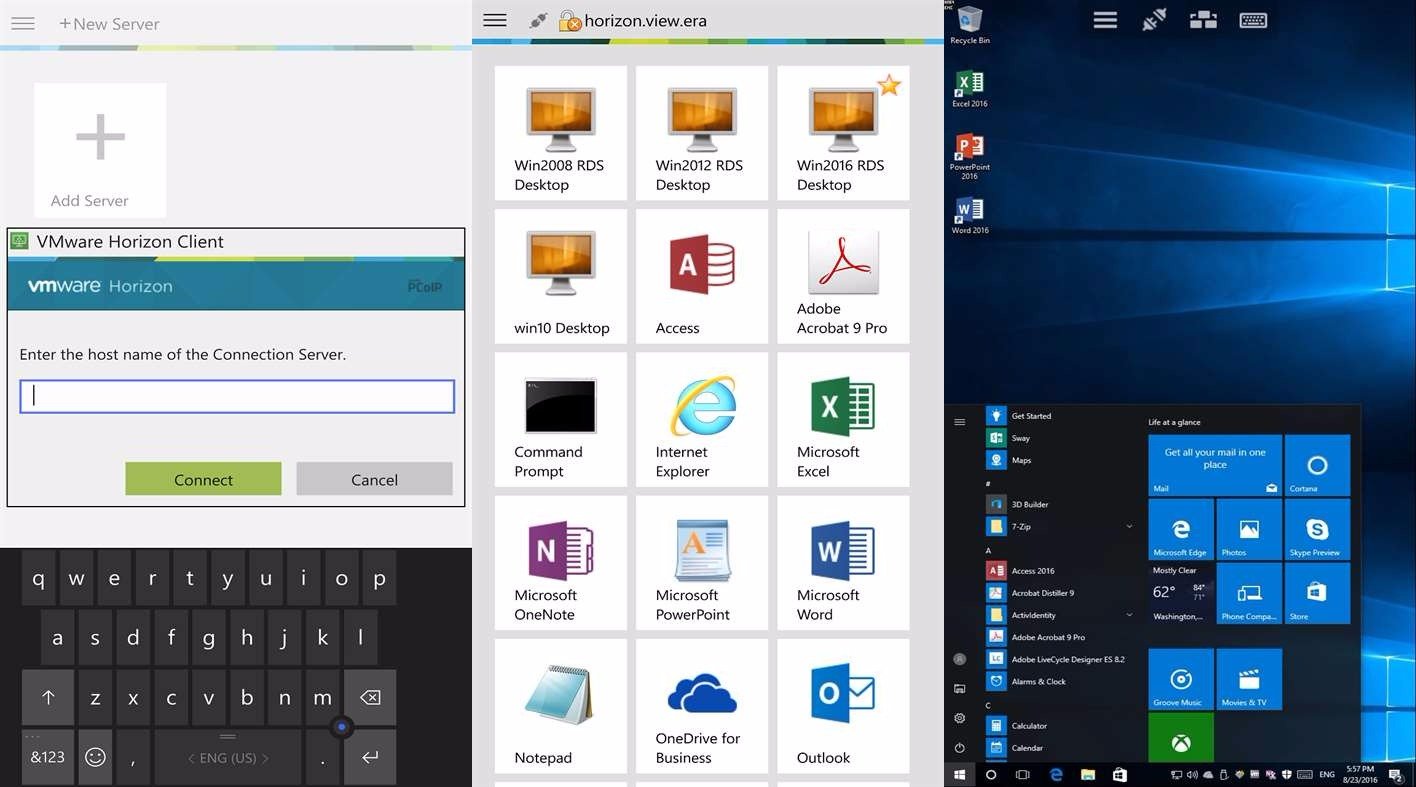
In the last days I needed to get a quick view of which templates we’re using on enviroments. Because we have linked clones, our pools have configured a ParentVM and the respective Snapshot.

If you have a large environment after a while you may miss a little bit control of which templates/parent vms are really being used, which ones were just for testing purposes and you don’t need them anymore, etc.

So, for a quick look at your environment and to understand which parent vms each pool is using just follow these steps:

  • First you’ll need to open View PowerCLI on the correspondent Connection Server
  • Then, run the following command:
    Get-Pool
  • As simple as that, you’ll get all info from each pool
  • If you want something like that but, with less information use the followin command:
    Get-Pool | Select pool_id, displayName, enabled, vcServerName, parentVMPath, parentVMSnapshotPath
  • Like in any powershell script or command, you can always export the results to a csv file to work it up later:
    Get-Pool | Select pool_id, displayName, enabled, vcServerName, parentVMPath, parentVMSnapshotPath | export-csv D:\export.csv

And…it’s done! :)

Friday, November 4, 2016

Microsoft Visual Studio Code 1.7.1 Available

The free, lightweight and cross platform version of Visual Studio is now available for download on it’s 1.7.1 version.

Download and take a look on what’s new, here:
Microsoft Visual Studio Code 1.7.1

Thursday, November 3, 2016

Surface Studio Presentation Theme – Download Here!

Besides the hype after Microsoft’s new Surface device, it was clear to me, not only because of this Windows 10 October Event, that Microsoft is finally embracing, open-faced, the good things competition does.

One of the most compeling things about Apple it obviously it’s image. It’s design and…the way they show they’re products. For those who assisted to any Apple’s presentation, it’s easy to remember that beyond specs and functions, there was a real understanding about all the surroundings of a product presentation.

Beautiful images mixed with envolving sounds really matter and thankfully Microsoft understood that!

It’s not just this presentation but probably since Windows 10 first presentation.
Microsoft now does show great devices, a lot of specs and functions, but in a way that isn’t meant just for…geeks, and that’s a good thing!

From Windows 10 October Event, many talked about the Surface Studio video theme.
Stephanie Tarling did the singing on ‘Pure Imagination’. This was an original song from 197 film ‘Willy Wonka & the Chocolate Factory’ and was originally sung by Gene Wilder. This cover was produce by Nathan Lanier, best known for his music for Halo 4.

Now, Stephanie Tarling made this song available on BandCamp.com and you can here it, download it or just share it right now:

Wednesday, November 2, 2016

VMware Remote Console – hcmon driver error

hcmondrivererror

Last week I stumble upon this error when installing VMware Remote Console (VMRC).
After some googling about it I found just one way to solve this but…it works.

To quickly solve this and be able to user VMRC, just uninstall first VMware vSphere Client and then install VMRC.

And…it done!

Hope this helps people with the same issue. If anyone has any other way to solve this, please feel free to share.

Sunday, September 11, 2016

VMware Horizon Client - New PC and Mobile App Available


And may I say...Finally!
VMware made available a Windows 10 PC and Mobile app for VMware Horizon Client!


This new app it's compatible with VMware Horizon 7 and here's the release notes highlights:
  • Leave the desktop behind with Horizon Hosted Applications: Use VMware Horizon 7 hosted applications, leave the desktop behind and run remote application with delight experience.
  • Enhanced user experience: The VMware Blast Extreme protocol used with Horizon 7 is designed and optimized for mobile users. Blast Extreme leverages H.264 hardware decoding to deliver the best remote experience while reducing power consumption.
  • Work smarter with continuum: Attach your Windows 10 phone to a monitor, mouse and keyboard through wired or wireless accessories to get complete workspace experience without productivity compromise.
Note that this app it's VMware Horizon 7 compatible only and it's still in beta.

If you want to take a look and give your own opinion download it on Windows Store:

Tuesday, September 6, 2016

MDT 2013 Update 2 - Bug When Changing Application Command Line?


So today I'll talk about something odd that happen just yesterday.
I've published a new application in MDT and added it to my task sequence (TS).

After that I've noticed that I had to change the msi file name so just went to DeploymentShare\Applications, changed the file name and also changed the install command-line in MDT to match the new file name.


Basically the changes was from a filename with spaces to a filename with "underscores".
After testing the TS, I've received a return code error (1639 - invalid command line argument).

Double-checked everything and after looking at ZTIApplications.log file I've found out something strange.
It seems the TS for some reason didn't assume my install command-line changes. And it was running the command without underscores and with spaces:


So...for my surprise, and to solve this issue, I had to go to my TS again, select the application and the browse for published applications and select that one (Cirrato Client) again.

This solve this issue that I don't remember to see in previous MDT versions.


Hope this helps people having the same same strange behavior! ;)


Friday, August 26, 2016

GPOs - Disabling BitLocker Service Fails via Group Policy Preferences [Solved]


Today I've came across a strange issue when trying to disable "BitLocker Drive Encryption Service" with Group Policy Preferences (GPP).

Thanks to Helge Klein - Tools for IT Pros website this was really quick to solve!

After some reading, it seems it's related with the service permissions. This can be proven if you navigate to event viewer and you'll see a warning in application event log with an "Access Denied" for the Group Policy Services source.

"Googling" a little more about this, I've found out a way to solve this one.

So, follow theses steps:
  1. First of all, download SetAcl from here
  2. Now run following from the command-line (elevated)
    SetACL -on BDESVC -ot srv -actn ace -ace n:Administrators;p:full
And...it's all done! Now just execute "gpupdate /force" or reboot and then BitLocker Drive Encryption Service will be in "Disabled" state.

BlackViper.com - Known your OS services


Although this website exists for ages, and being known by the deployment and tweaking community for a long time, today, I'd like to show here a very nice resource for everything related with Windows services.

Created and maintained by Charles "Black Viper" Spark, BlackViper.com it's an extensive and comprehensive guide of Windows Services from Windows XP to Windows 10.
It's like having a library listing all possible services with information like, Display Name; Service Name; Default Status; etc.

Black Viper also gives information about the best values for tweaking; which ones are safe values, etc.

There are also some guides for tweaking which are a very nice source of information for that people trying to get best score for benchmarking software.

For me, this website it's mainly used to very very quickly get the service names i'm looking for. All in just one place.


Hope you enjoy it! ;)

Thursday, August 25, 2016

MDT - Showing More Windows PE Features


In Microsoft Deployment Toolkit (MDT) if you need to add additional features to your boot images, you'll go to your Deployment Share Properties and than you open Windows PE tab and select Features.

Here you'll find all features that Windows PE boot image has available and add/remove them.
For some strange reason there are some missing features here and therefore you aren't able to select them.

Like almost anything in MDT, the list of viewable features are controlled using an XML file,
Now, to show more features that you can add to your Windows PE boot images, follow these steps (assuming you've installed MDT on default install location):

  • Close MDT
  • Navigate to "C:\Program Files\Microsoft Deployment Toolkit\Bin\FeatureNames.XML"
  • Here, you'll find some features with an additional parameter (option="exclude")
  • Remove the option="exclude" tag
  • Save file and launch MDT
  • The "Windows RE Configuration" will now appear on Windows PE features

Note:
This is particularly important if you need to use Windows Powershell feature because some of it dependencies like WMI it's not present on this list by default.

Monday, August 22, 2016

Windows Deployment - Back to Basics - DISM - Drivers Management

Here's a post just to review some basic DISM (Deployment Image Servicing and Management tool) commands that are always useful when managing your base image:

Injecting drivers to boot.wim
DISM.exe /Mount-Wim /WimFile:C:\Mount\boot.wim /Index:1 /MountDir:C:\Mount\BootWIM
DISM.exe /Image:C:\Mount\BootWIM /Add-Driver /Driver:C:\Mount\Drivers /recurse
DISM.exe /Unmount-Wim /MountDir:C:\Mount\BootWIM /Commit


Viewing drivers on wim file
DISM.exe /Mount-Wim /WimFile:C:\Mount\boot.wim /Index:1 /MountDir:C:\Mount\BootWIM
DISM.exe /image:C:\Mount\BootWim /Get-Drivers


Windows Deployment - Back to Basics - MDT/SCCM Logs Locations


One of the most important thins when creating a Windows Deployment process is to know exactly where to look at when something goes wrong.

Over the years, Microsoft got their logging a lot better and much easier to read for MDT and SCCM.
Although the improvments, it's not always clear where to find this log files that can make you save precious time when troubleshooting.

So, heres a very quick table guide where to find the log files:

Timeframe Location
WindowsPE (before HDD format) x:\windows\temp\smstslog\smsts.log
WindowsPE (after HDD Format) x:\smstslog\smsts.log and copied to c:\_SMSTaskSequence\Logs\Smstslog\smsts.log
Windows (before SCCM Agent installed) c:\_SMSTaskSequence\Logs\Smstslog\smsts.log
Windows (after SCCM Agent installed) c:\windows\system32\ccm\logs\Smstslog\smsts.log
Windows x64 (after SCCM Agent installed) c:\windows\sysWOW64\ccm\logs\Smstslog\smsts.log
After Task Sequence finish c:\windows\system32\ccm\logs\smsts.log
After Task Sequence finish x64 c:\windows\sysWOW64\ccm\logs\smsts.log

Tuesday, August 9, 2016

Microsoft Edge - Enabling TCP Fast Open (TFO)


TCP Fast Open (TFO) is a new extension meant to replace the old T/TCP system.
According to Google, this new system can improve page load time by 10% to 40%. This can be achieve by reducing traffic back and forth between the client and the server.

In a very resumed way, the less latency you can have between two far away systems the faster the load times are.

Microsoft also write a detailed blog about this back in June:
Building a faster and more secure web with TCP Fast Open, TLS False Start, and TLS 1.3 Read more at https://blogs.windows.com/msedgedev/2016/06/15/building-a-faster-and-more-secure-web-with-tcp-fast-open-tls-false-start-and-tls-1-3/#Te0IgPhiPFmv0Rd9.99

Microsoft's main objective for Edge it's to end the gap that it had last years on the browsers world, and the strategy it's all about do the good things other competitor do and also stand out with nice new features.

So, TFO it's now available on Edge (you'll need Windows 10 Anniversary Update).

To enable this feature, follow this steps:
  1. Open Microsoft Edge
  2. In the address bar type
  3. Scroll down to Networking
  4. Check Enable TCP Fast Open
  5. Restart Microsoft Edge (just need close and open again)

Be aware this feature it's still experimental so there could be some issues.
If you experiencie any problems, just repeat the above process and uncheck the Enable TCP Fast Open option.

Monday, August 8, 2016

Windows 10 v1607 Now Available on VLSC


Microsoft just released a few hours ago the media files (ISOs)  for Windows 10 Enterprise v1607 a.k.a. "Windows 10 Enterprise with Anniversary Update." through it's Volume Licensing Service Center (VLSC) website.

So, follow the link below, sign in and get you Windows 10 Enterprise version 1607:
Microsoft Volume Licensing Service Center

Windows 10 ADK v1607 - WSIM Changes


With the introduction of the fresh Microsoft Windows 10 ADK v1607, there are also change to Windows System Image Manager (WSIM) and Unattend.xml files.

To a complete list of changes, here's the MSDN article:

Windows 10 ADK v1607 Available


Following the this early August release of Windows 10 v1607, Microsoft also made available a new version of Windows 10 ADK (Windows Assessement and Deployment Kit) v1607.

Grab the new version from the download link:
Microsoft Windows 10 ADK v1607


Remember that, like other versions of Windows 10 ADK, therer's no in-place upgrade, so you'll have to uninstall the previous versions you've install first.

Friday, August 5, 2016

Windows 10 Anniversary Update (v1607) - Forcing Update


So after 3 or 4 days your Windows 10 v1511 still not upgrading to v1607 (anniversary update).
Here's a quick and easy way to force update right now!
  • Go to Windows 10 update history website
  • Just click "Get the Anniversary Update now" button and download the upgrade tool
  • The tool we'll check your system before upgrade and...you're done! ;)

Windows 10 Anniversary Update - How to have It?


Now that Microsoft got out Windows 10 Anniversary Update, or Windows 10 v1607, here's to ways to download it.

First and more straightforward:
  • Go to Settings (Windows Key + I) > Updates & Security > Windows Update
  • In Windows Update click "Check for Updates" and the windows Anniversary Update should appear as "Feature update to Windows 10, version 1607".

Other way for later or offline install:
  • Go to Settings (Windows Key + I) > Updates & Security > Windows Update
  • Now click "Learn More" and you'll be taken to a Microsoft.com support page where you can download Windows 10 v1607 ISO file.


Windows 10 Anniversary Update Highlights


Starting rollout yesterday, the new Windows 10 Anniversary Update comes with some nice new features. Again, and following Microsoft's strategy since Windows 10 first alpha and beta versions, a lot of the new features were introduced using customer feedback, specially from the Windows Insider's program.

So, here are some of the highlighted features:

  • Windows Ink
    Allows users to quickly take notes, sketch on a screenshot or draw out something. For example, smart sticky notes can detect that you write down a date or time and Cortana asks if you want to create a reminder.
  • Windows Defender and Windows Hello
    Defender now has an option to automatically schedule quick scans. Windows Hello gets a more deep integration with Microsoft Edge for a quick and secure website login.
  • Microsoft Edge Power Increased Power Efficiency
    Edge got an update to it's power saving capabilities that ensures a more durable battery life, for example, reducing power consumptiong when view videos online.
  • Microsoft Edge...Extensions!! (finally)
    So it's finally here! The Windows 10 Anniversary Update finally brings extensions for Edge browser!
    There's not a lot too choose from, but this is just the beginning!
  • One Store to Rule Them All
    Following Microsoft's strategy of convergence, Windows and Xbox One now share the same Windows store. This means a more fluid and intuitive experience across platforms and also a seamless way to buy, subscribe, download from anywhere.

Finally, heres a video about this and other highlights directly from Windows Blogs website:


Friday, February 26, 2016

Windows 10 Tips - Getting a Detailed Report About Your WiFi Connection


If you're getting some issues with your WiFi connection in Windows 10, here's a quick and nice way to get a detailed report without installing additional software:
  • Open a command line as an Administrator (Run As Administrator)
  • Now run the following command line:
    netsh WLAN show WLANreport
  • Now, open a browse and copy/paste the this path:
    C:/ProgramData/Microsoft/Windows/WlanReport/wlan-report-latest.html
And here's a nice and detailed report about all your wifi activity, errors, etc.

Wednesday, February 24, 2016

GPOs - Black Screen After Applying Wallpaper GPO [Solved]

And after 3 days of maniac troubleshooting, googling and...1 hour of Microsoft Premier Support this one it's finally solved!
Here's a quick resume of the issue and, in my case, what was happening.

Symptom
After apply a GPO to change Windows background to a corporate wallpaper for all users, instead of the changing to the correct image, users got a black screen.


Issue/Resolution
After 3 or 4 days of troubleshooting Microsoft gave me a nice way to quickly understand if this was a problem with our image or something else.
  • Get an image that originally comes with Windows, you can find them in "C:\Windows\Web\Wallpaper\".
  • Now, copy the image to the same folder and the same name you've configured your GPO setting.
  • Reboot the machine
Now, if the image shows up, this probably means that there's an issue with your image.

In my case, the image that was delivered was 8 bit depth instead of 24 bit depth. This caused the issue.
After converting the image to 24bit depth (with Paint.NET for example) the corporate wallpaper showed up exactly how it should!


Hope this helps people struggling with this issue!